# ModStart安装说明
# 环境要求
# 操作系统
- Linux
- Windows
推荐 Linux 操作系统,性能比较好
# 软件环境
Laravel 5.1 版本
PHP 5.6PHP 7.0MySQL>=5.0PHP Extension:FileinfoApache/Nginx
Laravel 9.0 版本
PHP 8.0PHP 8.1MySQL>=5.0PHP Extension:FileinfoApache/Nginx
我们的测试基于 PHP 的 5.6 / 7.0 / 8.0 / 8.1 版本,系统稳定性最好
# 界面方式安装
# ① 配置服务器
配置 Apache 或 Nginx 服务器,请将网站的根目录配置到 <网站目录>/public。
配置可参考 配置参考 部分。
# ② 访问安装路径
访问 http://example.com/install.php,其中 example.com 为你的域名。
# ③ 安装引导
使用安装引导向导进行安装。
# 命令行安装方式
# ① 配置服务器
配置 Apache 或 Nginx 服务器,请将网站的根目录配置到 <网站目录>/public。
配置可参考 配置参考 部分。
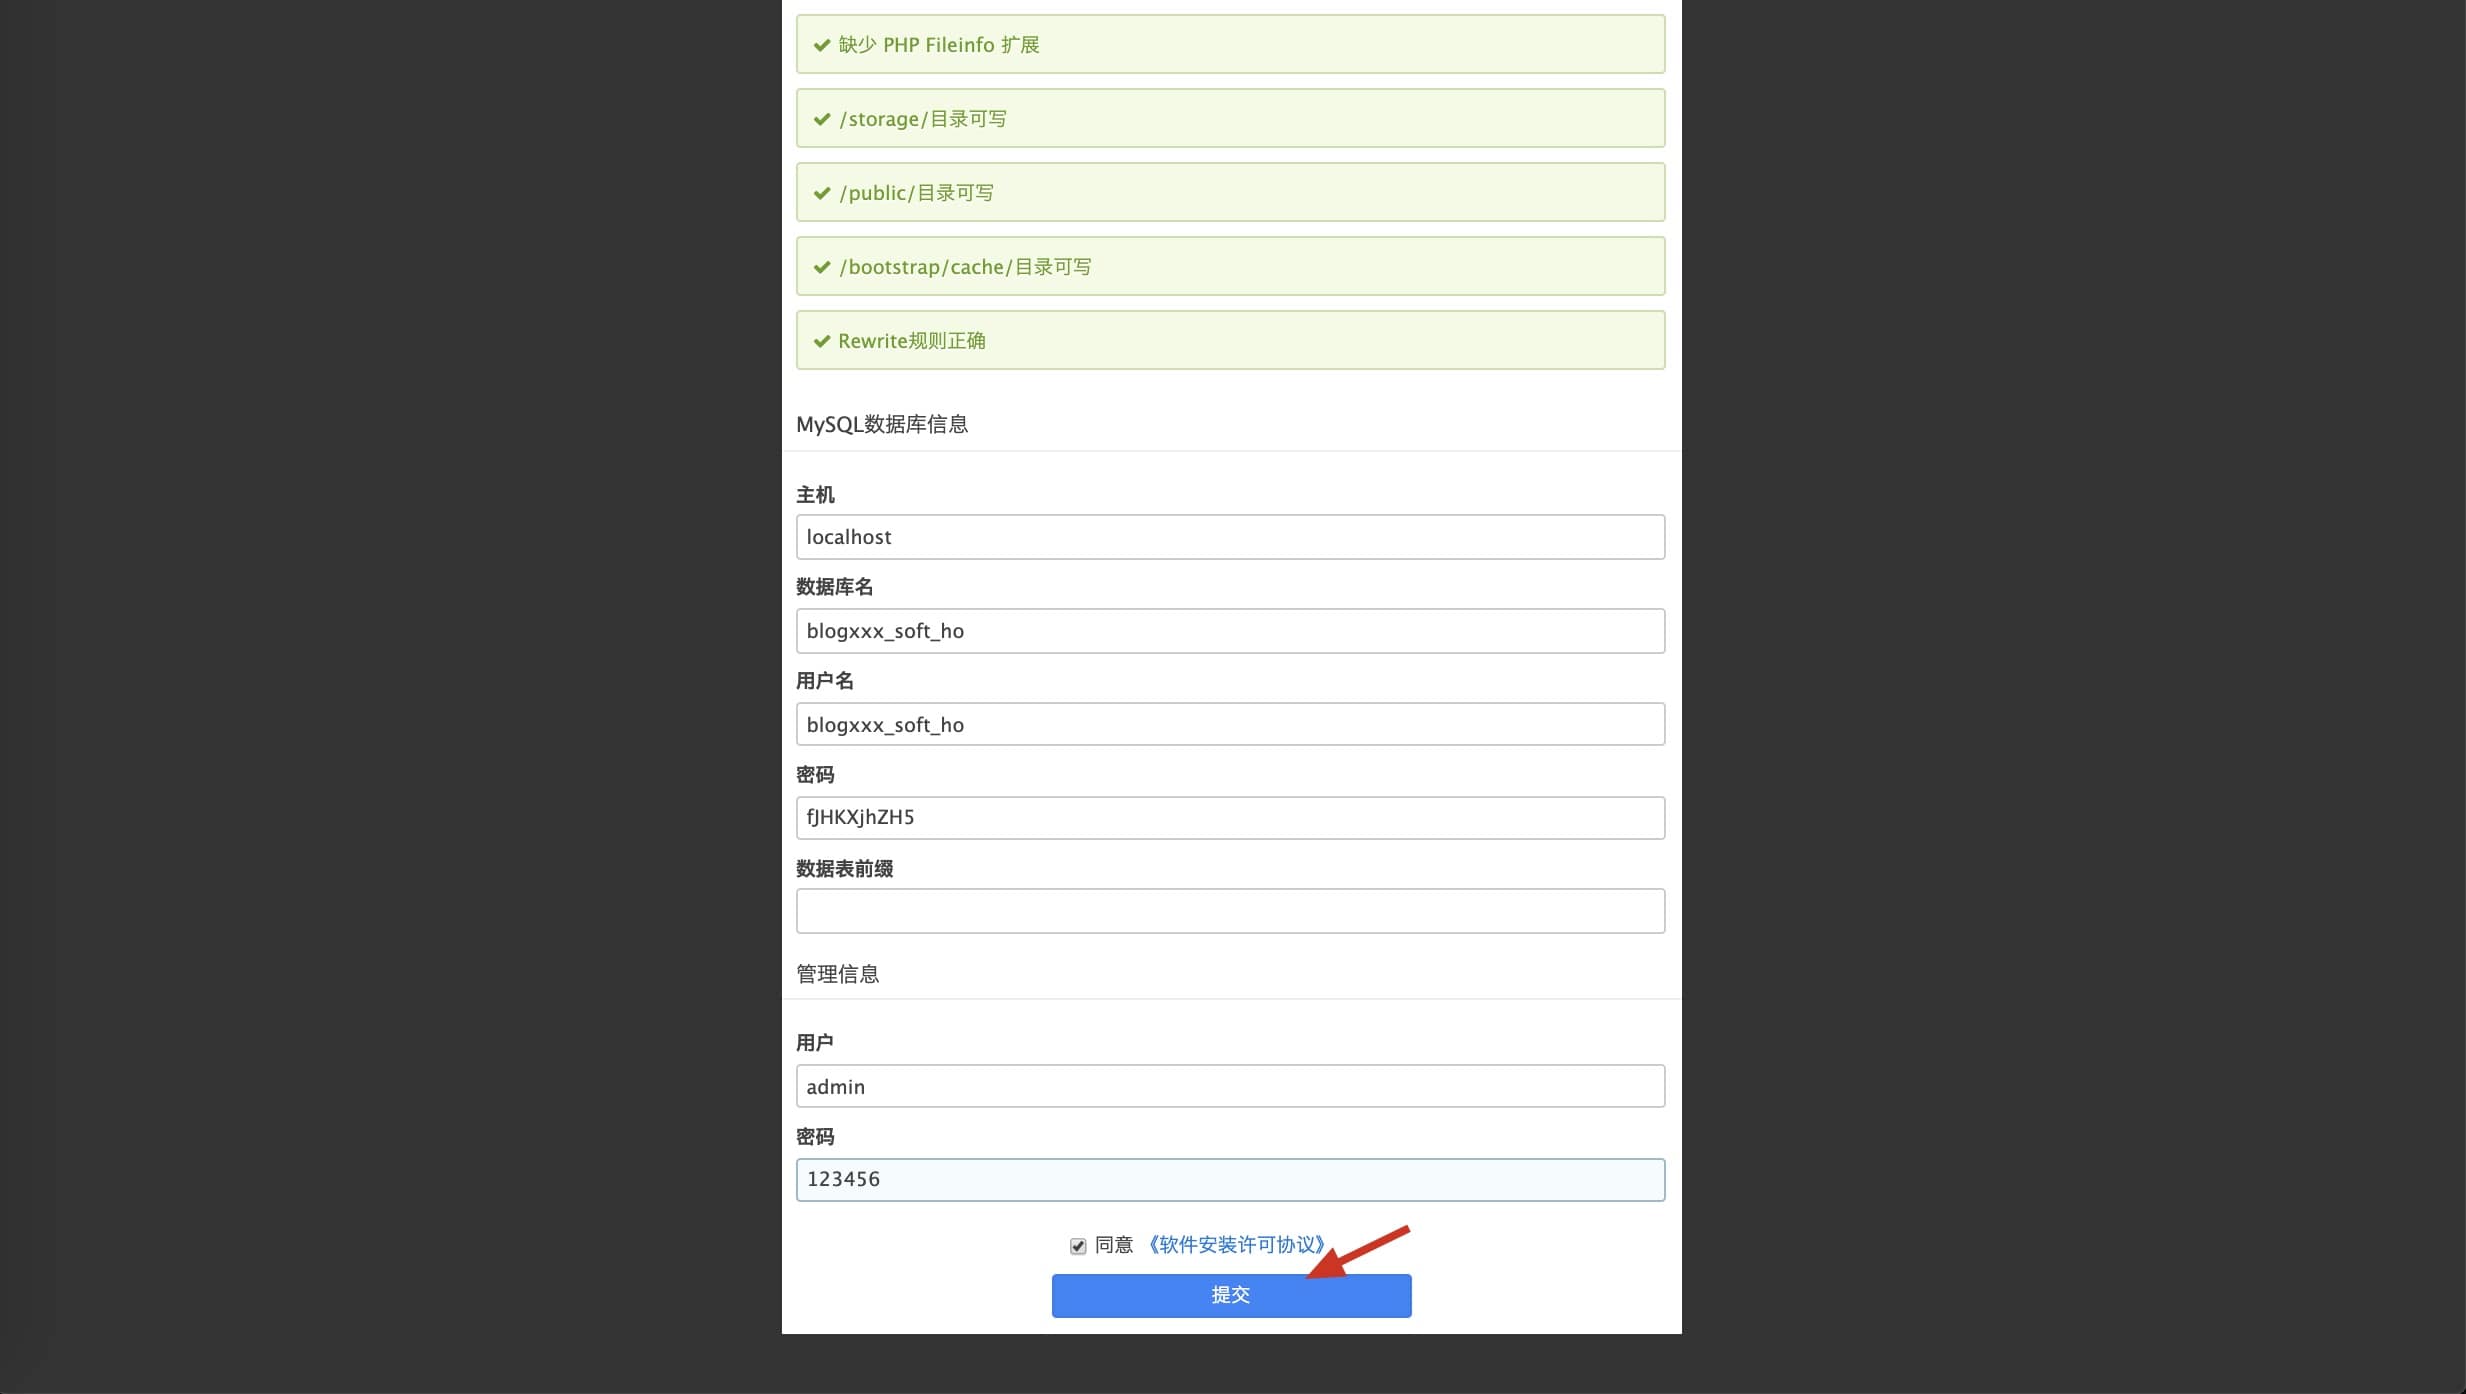
# ② 修改配置文件
在网站根目录创建一个配置文件 /path/to/website/.env ,内容参考如下:
APP_ENV=product
APP_DEBUG=true
# 这个Key需要随机生成,建议使用32位的字符串
APP_KEY=AAAAAAAAAAAAAAAAAAAAAAAAAAAAAAAA
ENCRYPT_KEY=AAAAAAAAAAAAAAAAAAAAAAAAAAAAAAAA

# 数据库配置
DB_HOST=localhost
DB_DATABASE=modstart
DB_USERNAME=root
DB_PASSWORD=123456

# 后台管理路径
ADMIN_PATH=/tadmin/

# 初始化后台管理用户和密码,如用户名为admin,密码为123456,可配置为如下:
MS_INIT_ADMIN_USERS=admin:123456
1
2
3
4
5
6
7
8
9
10
11
12
13
14
15
16
17
2
3
4
5
6
7
8
9
10
11
12
13
14
15
16
17
# ③ 执行命令安装
执行以下命令完成安装
php artisan migrate
php artisan modstart:module-install-all
1
2
2
# 配置参考
# Nginx参考配置
server {
    listen       80;
    server_name  yourdomain.com;
    charset utf-8;
    index index.php index.html;
    root /path/to/yourdomain.com/public;
    autoindex off;

    location ^~ /.git {
        deny all;
    }

    location / {
        try_files $uri $uri/ /index.php?$query_string;
    }

    location ~ \.php$ {
        fastcgi_pass   127.0.0.1:9000;
        fastcgi_index  index.php;
        fastcgi_param  PHP_VALUE  "open_basedir=/path/to/yourdomain.com/:/tmp/:/var/tmp/";
        fastcgi_param  SCRIPT_FILENAME  $document_root$fastcgi_script_name;
        include fastcgi_params;
    }

    location ~ \.(gif|jpg|jpeg|png|bmp|ico|css|js)$ {
       expires max;
    }

    location ~* \.(eot|ttf|woff|woff2)$ {
        add_header Access-Control-Allow-Origin '*';
    }

}
1
2
3
4
5
6
7
8
9
10
11
12
13
14
15
16
17
18
19
20
21
22
23
24
25
26
27
28
29
30
31
32
33
2
3
4
5
6
7
8
9
10
11
12
13
14
15
16
17
18
19
20
21
22
23
24
25
26
27
28
29
30
31
32
33
# Apache参考配置
<VirtualHost *:80>
  ServerName www.yourdomain.com
  DocumentRoot d:/wwwroot/www.yourdomain.com/public
</VirtualHost>
1
2
3
4
2
3
4
# IIS参考配置
<?xml version="1.0" ?>
<rules>
    <rule name="Rule 1" stopProcessing="true">
        <match url="^(.*)/$" ignoreCase="false" />
        <action type="Redirect" redirectType="Permanent" url="/{R:1}" />
    </rule>
    <rule name="Rule 2" stopProcessing="true">
        <match url="^" ignoreCase="false" />
        <conditions>
            <add input="{REQUEST_FILENAME}" matchType="IsDirectory" ignoreCase="false" negate="true" />
            <add input="{REQUEST_FILENAME}" matchType="IsFile" ignoreCase="false" negate="true" />
        </conditions>
        <action type="Rewrite" url="index.php" />
    </rule>
</rules>
1
2
3
4
5
6
7
8
9
10
11
12
13
14
15
2
3
4
5
6
7
8
9
10
11
12
13
14
15
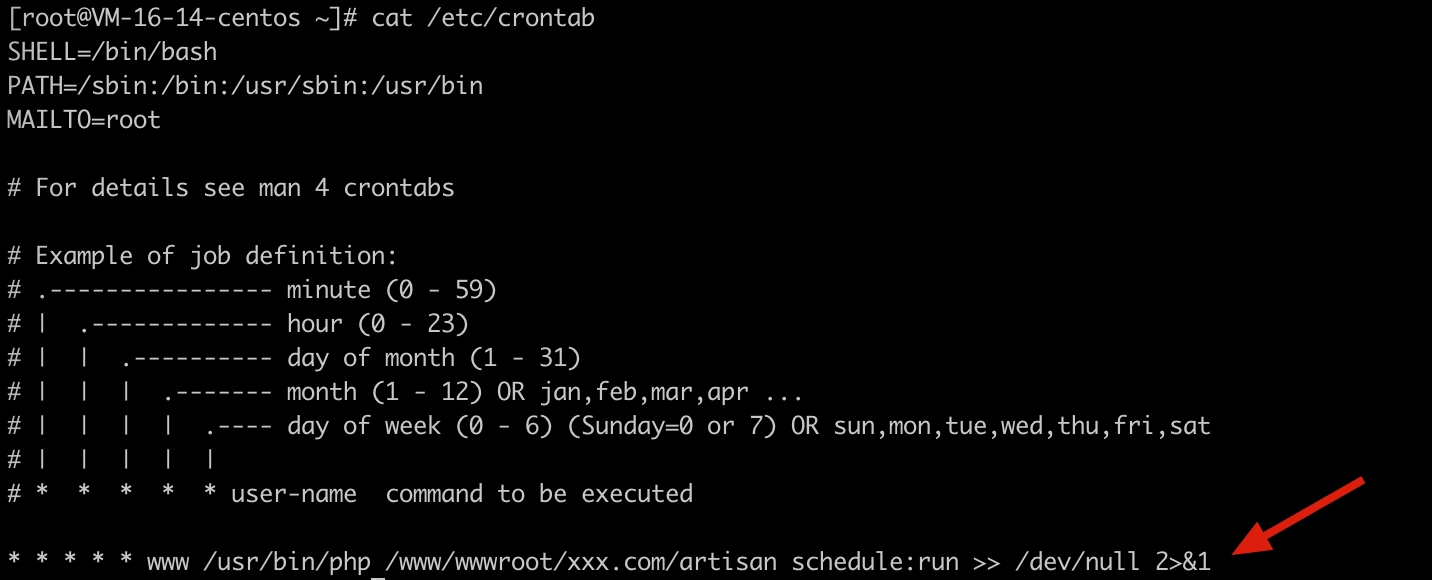
# 任务调度配置
Linux
任务调度命令为,需要将该命令配置到系统的 cron 服务中,可直接通过执行以下命令完成
* * * * * www /xxx/bin/php /www/wwwroot/example.com/artisan schedule:run > /dev/null 2>&1
1
/xxx/bin/php替换成 PHP 的运行路径,通常为/usr/bin/phpwww需要替换成为 PHP 的执行用户/www/wwwroot/example.com需要替换成为真正的网站目录
执行完成后可检查下配置,输出 cron 配置(cat /etc/crontab)确保调度添加成功